WARNING: Rebecca D. shows flagrant disregard for the rules of punctuation... She uses ellipsis with wild abandon... Punctuation interventions have been done to no avail... If you are offended by such irreverence to the rules of grammar... The very glue that holds our society together... STOP READING NOW... Move on... There is a little button at the top that says "next blog"... You would be well advised to use it... You were warned...

Showing posts with label Crafts. Show all posts

To Tote or Not To Tote...

Friday, September 28, 2012

That is today's question...

A few weeks back Allison saw this idea online to make a tote bag using fabric, duct tape and staples... I was dubious at best, but she was so enthusiastic I reluctantly agreed to go on a semi late night run to Wal-Mart for the supplies...
To be perfectly honest, I have so little time left with her at home, I wasn't all that hard to convince... We are making memories here folks... But one of the ways she thought she had convinced me to go along with this plan, was by promising to take pictures of each step for me to post here on my blog. Now you, my long suffering readers know, this blog is not a crafts & tutorials kinda blog... I am not a good enough blogger to even remember to take "before" pictures most of the time, so tutorials are usually not my forte'...
Well, Allison will not be deterred and asks frequently if I've posted her tote bag project yet...
So here goes!

Here is what you need to make your own "No-Sew Duct Tape Tote"
The fabric she chose is like a canvas, upholstery type fabric... I don't know if this makes a difference, but her tote does feel pretty heavy duty and I think the fabric played into this... A tape measure, Nylon (or cotton if you can find it) webbing for the handles, scissors, duct tape, and a stapler... (I have to admit, at this point I was still pretty dubious about the "no-sew" nature of this project.)

She got a full yard because she wanted it a sit bigger then the one she saw online which called for 3/4 of a yard of fabric...

You cut the fabric in half , and flip the first piece over...
Next you completely cover the back side of the fabric with duct tape, overlapping slightly.

You do this to both pieces of fabric.

Here they are done, and she trimmed the edges so they were completely even. This is the part that took the longest (if you don't count choosing the fabric).

Next you cut between 12-18" of the webbing depending on how long you want them. Remember you will lose between 2-3" in the construction, so figure that in... Allison went with 18" so she would end up with approximately 16" handles.

Next you choose the top of your tote (depending on the fabric design, the top may be pretty clear.) and fold the top over about 1 1/2"
(Sorry we decided to do this project on our leather ottoman which acts as a coffee table... We didn't realise at the time how closely the color of the duct tape resembled it...)

Next you measure to find the center of the top, then 4" out on both sides from that center mark. (So that you have 8" between the ends of your handles) Here is where you staple the heck out of the webbing. Now be careful to only staple through ONE layer, the one you folded down, or the staples will show on the outside of your tote.

Next you cover the fold, and end of the webbing where the staples are with, you guessed it, more duct tape.

Here are both sides done.

Next lay them one on top of the other with the duct tape side out and staple all the way around the tote. On this first one she did it as pictured, but we did notice the staples showed a bit on the "seams" of the finished product so when we did a second one she overlapped the ends of each staple a bit and this solved the problem.

You go all the way around the three sides. (You know the ones without the handles.)

then tape the edges... Here is where we ran out of the brown duct tape... The one she saw online was smaller, but if you make it larger you will need a second roll of tape.

Next you fold in the bottom corners of the tote, we didn't take a picture of this step, but this is what gives it it's shape. Then tape it all down on the inside. We actually went back the next day and got more of the brown duct tape and when we did we also used some to cover a piece of thick cardboard we had around the house to create a more stable bottom... But It did seem pretty secure without this step.
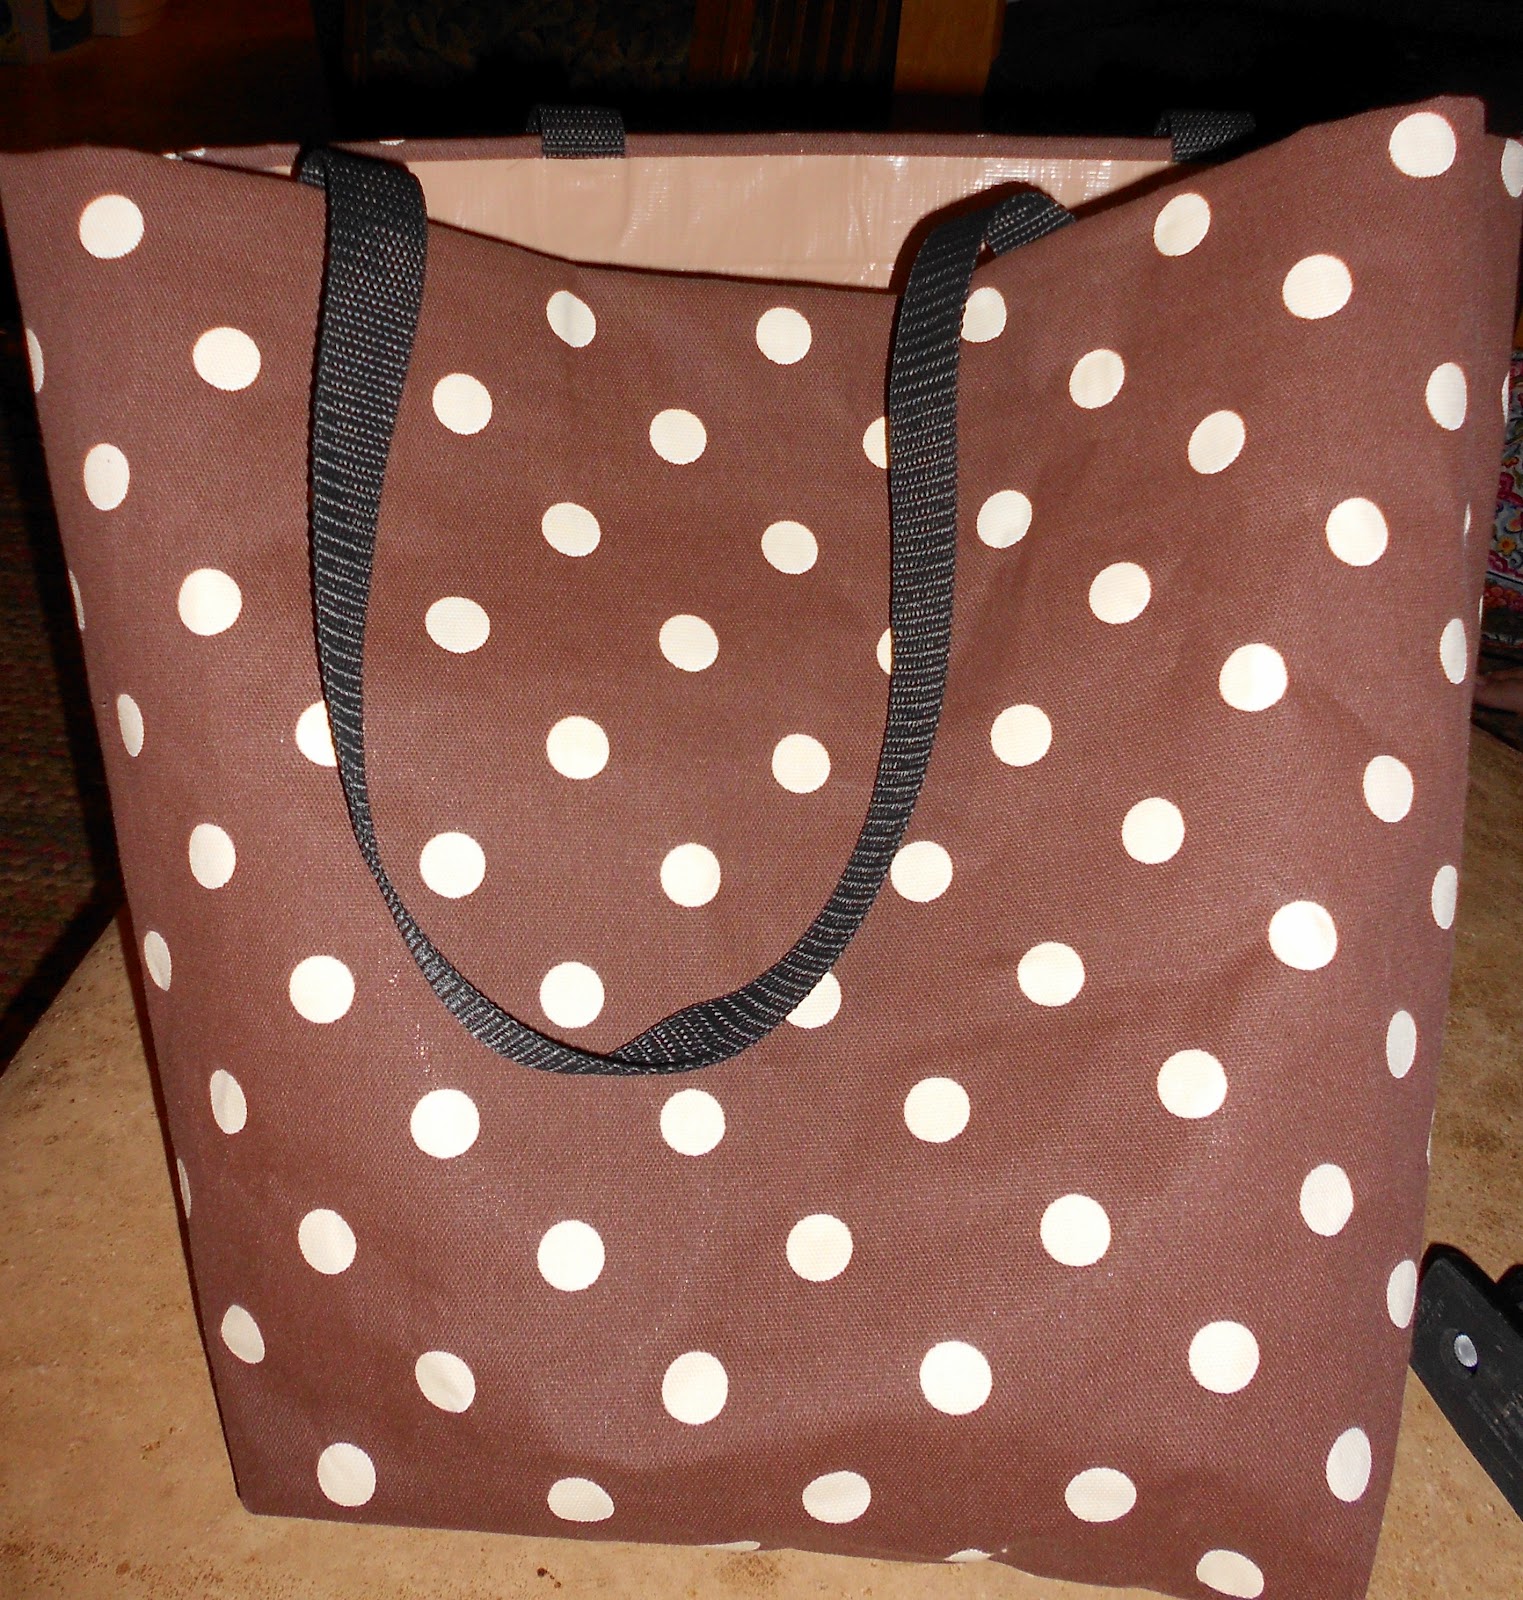
Here is the finished tote... I have to admit, a month into the school year watching her use this to lug heavy books around, I am a believer in the staple/duct tape combo! Plus the inside is fairly waterproof so when she took it to the beach she brought back their wet towels, swim suits and a bunch of sea shells in it, then she just wiped it out and used it the next day for school!

Thanks for listening,

Five Favorites Friday....

Friday, March 26, 2010

I just posed about our prom dress success yesterday, but this is Friday and so it is also the day for my five favorites. I also decided to sign up for the "Friday Follow" again... I have met some of the coolest people and found some really cool blogs I may never have found otherwise.

So without further ado...

Here are my favorites this week....

1. Snorg Tees...
Click HERE to view what are in my opinion some of the funniest shirts... (warning... some are PG13)..
I laughed so hard at these... (yes, I am a nerd...)


Surprise contest... The first person who can tell me what this next one references, I'll send a little gift too... I am getting this one for the Axeman... he would get it... let's see which of you think like him... Seriously!
(If you do leave a guess and your email isn't linked up to your profile, be sure to leave that also...)
(PS... get your mind outta the gutter... this is really innocent...)


2. This wreath...
I made this for this front door this week...
I originally made this for the $5 challenge on Living With Lindsey...
But got lazy and didn't want to do the required tutorial so I just made it to spruce up the front door for Easter...


3. This Wreath Stand...
I picked this up at Target last week...


It doesn't look like much in the picture, but I keep making these seasonal wreaths and now they don't all have to hang on the front door... I had #4 in mind when I picked it up...


4. This wreath...
I found this at Mary Janes and Galoshes and fell in love.

I picked up the stuff to make this and think it will look cute on the stand...


5. These "Peep" banners...

Dana of Made posted the tutorial to make these on V and Co.
If I find time, I want to make these... they are way too cute...


”Friday

Sponsored this week by...
”"


MckLinky Blog Hop


Thanks for listening,

A Very Pink Night...

Monday, March 22, 2010

As I am sure you noticed by now, I changed my background for Easter. I picked this particular one in honor of the "Very Pink Night" we had....

Our Cate turned 18 this weekend. She wanted to do something memorable, so I wracked my brain for weeks and finally came up with a fun idea... how about a night out with some girls friends in a hot pink stretch limo? Here take a look....

Ironically Cate (far left) straightened her hair for this outing
and Sparky (second from right) curled hers....

This was one seriously long and seriously pink limo!

Now since this isn't really the "clubbing" crowd I came up with a plan for these girlies...
I staged an "amazing race" style scavenger hunt around our fair city. They were given a clue at the beginning of the night and solving that led them to their first destination... and after completing a task there they got another clue... and so on... They unanimously agreed you haven't lived until you pull up to the dollar store in a pink stretch limo! (Their purchase you ask?... They bought "pork rinds"... yes, there is little in this world more southern then going to the dollar store to buy pork rinds in a limo!... )


A peek inside...

This is what it looked like all lit up when they arrived at home...

They had a great time and said they felt like "rock stars" all night... Total strangers were taking their picture and they caused quite a commotion everywhere they went... or so I heard... I did not ride in this limo... this was not a party for moms... When they came home they had snacks, cupcakes and relived every minute...(see, I did get to go...)
Here is how I decorated the table... (please note I blurred out our Cate's real name for her privacy.)


It was looking a little plain so I added an extra feather boa...
Once I added the snacks the table was really fun, but of course by then I gave up on taking pictures...

You can see the boa in the background here...

Here is a better look at the banner I made with my nifty new Cricut I got for Christmas....

Here is a close up...
It turned out really cute...
Yes... it was a very pink night...

I am still in denial about my sweet Cate turning 18... I am sure I will be plaguing y'all with baby photos of her soon...

I also made some cute necklaces to give her guests, but in the commotion I forgot to give these to them. I don't want to ruin the surprise, so I will post about those later...

PS... Wanna meet all your neighbors? Even the ones who won't even nod? Hire a hot pink limo and have it parked out front of your home for about 20 minutes... Curiosity will get the best of them...

Thanks for listening,


DIY Day @ ASPTL

My crafty ways...

Wednesday, March 10, 2010

The crafting vacation I did "not" confess to Monday has been a lot of fun... I wanted to show you some of what I've been up to....

I took this plain clipboard that cost .98 at Walmart


And turned it into this with some cute paper, chipboard and some mod-podge...


I also have been doing a lot of crafting for the Alice In Wonderland theme swap I was participating in. I know my swap partner received her package so now I can show you some of what I've been up to...

I made her this padded camera strap...

Did you notice the Mad Hatter in the center of the flower?

I've been making a bunch of these camera strap covers for gifts and they have been really fun.
The others I've been making don't have the flower...
but a few have camera lens cover pockets.

I also took a little vinyl scrapbook from Hobby Lobby, some mod-podge, ribbon and embellishments and spiffed it up for her...


She sent me some pictures of her cute family and I had fun scrapping them...
I admit the AIW theme here is a little weak... I shopped for supplies that reminded me of the overall story and theme, but didn't stick to just the theme for the pages...
Here, I'll show you...


Remember the hint I put out last week...


A couple people asked what I did with the Scrabble tiles...

I flipped them over and made these charms...
sorry the picture is so bad... I really wish you could see them...
One is a pocket watch, the Rabbit, Alice with a flamingo and the Mad Hatter all really vintage looking....
I used this dimensional jewel coat over them that made them turn out neat..
I plan to make more this week...

I also dressed up some treats...
(jelly beans and a chocolate bar...)

And after scrapbooking all those cute photos I wanted to include something for JJ...
(Her sweet boy)
He is into rockets, so when I saw this little wooden shape at Hobby Lobby I know I had to get it...
Sparky picked out the little Nerf ball for him...


Thanks for listening,


DIY Day @ ASPTL


giveaways