
That is today's question...
A few weeks back Allison saw this idea online to make a tote bag using fabric, duct tape and staples... I was dubious at best, but she was so enthusiastic I reluctantly agreed to go on a semi late night run to Wal-Mart for the supplies...
To be perfectly honest, I have so little time left with her at home, I wasn't all that hard to convince... We are making memories here folks... But one of the ways she thought she had convinced me to go along with this plan, was by promising to take pictures of each step for me to post here on my blog. Now you, my long suffering readers know, this blog is not a crafts & tutorials kinda blog... I am not a good enough blogger to even remember to take "before" pictures most of the time, so tutorials are usually not my forte'...
Well, Allison will not be deterred and asks frequently if I've posted her tote bag project yet...
So here goes!
Here is what you need to make your own "No-Sew Duct Tape Tote"

The fabric she chose is like a canvas, upholstery type fabric... I don't know if this makes a difference, but her tote does feel pretty heavy duty and I think the fabric played into this... A tape measure, Nylon (or cotton if you can find it) webbing for the handles, scissors, duct tape, and a stapler... (I have to admit, at this point I was still pretty dubious about the "no-sew" nature of this project.)
She got a full yard because she wanted it a sit bigger then the one she saw online which called for 3/4 of a yard of fabric...
You cut the fabric in half , and flip the first piece over...

Next you completely cover the back side of the fabric with duct tape, overlapping slightly.

You do this to both pieces of fabric.

Here they are done, and she trimmed the edges so they were completely even. This is the part that took the longest (if you don't count choosing the fabric).

Next you cut between 12-18" of the webbing depending on how long you want them. Remember you will lose between 2-3" in the construction, so figure that in... Allison went with 18" so she would end up with approximately 16" handles.

Next you choose the top of your tote (depending on the fabric design, the top may be pretty clear.) and fold the top over about 1 1/2"
(Sorry we decided to do this project on our leather ottoman which acts as a coffee table... We didn't realise at the time how closely the color of the duct tape resembled it...)

Next you measure to find the center of the top, then 4" out on both sides from that center mark. (So that you have 8" between the ends of your handles) Here is where you staple the heck out of the webbing. Now be careful to only staple through ONE layer, the one you folded down, or the staples will show on the outside of your tote.

Next you cover the fold, and end of the webbing where the staples are with, you guessed it, more duct tape.

Here are both sides done.

Next lay them one on top of the other with the duct tape side out and staple all the way around the tote. On this first one she did it as pictured, but we did notice the staples showed a bit on the "seams" of the finished product so when we did a second one she overlapped the ends of each staple a bit and this solved the problem.

You go all the way around the three sides. (You know the ones without the handles.)

then tape the edges... Here is where we ran out of the brown duct tape... The one she saw online was smaller, but if you make it larger you will need a second roll of tape.

Next you fold in the bottom corners of the tote, we didn't take a picture of this step, but this is what gives it it's shape. Then tape it all down on the inside. We actually went back the next day and got more of the brown duct tape and when we did we also used some to cover a piece of thick cardboard we had around the house to create a more stable bottom... But It did seem pretty secure without this step.
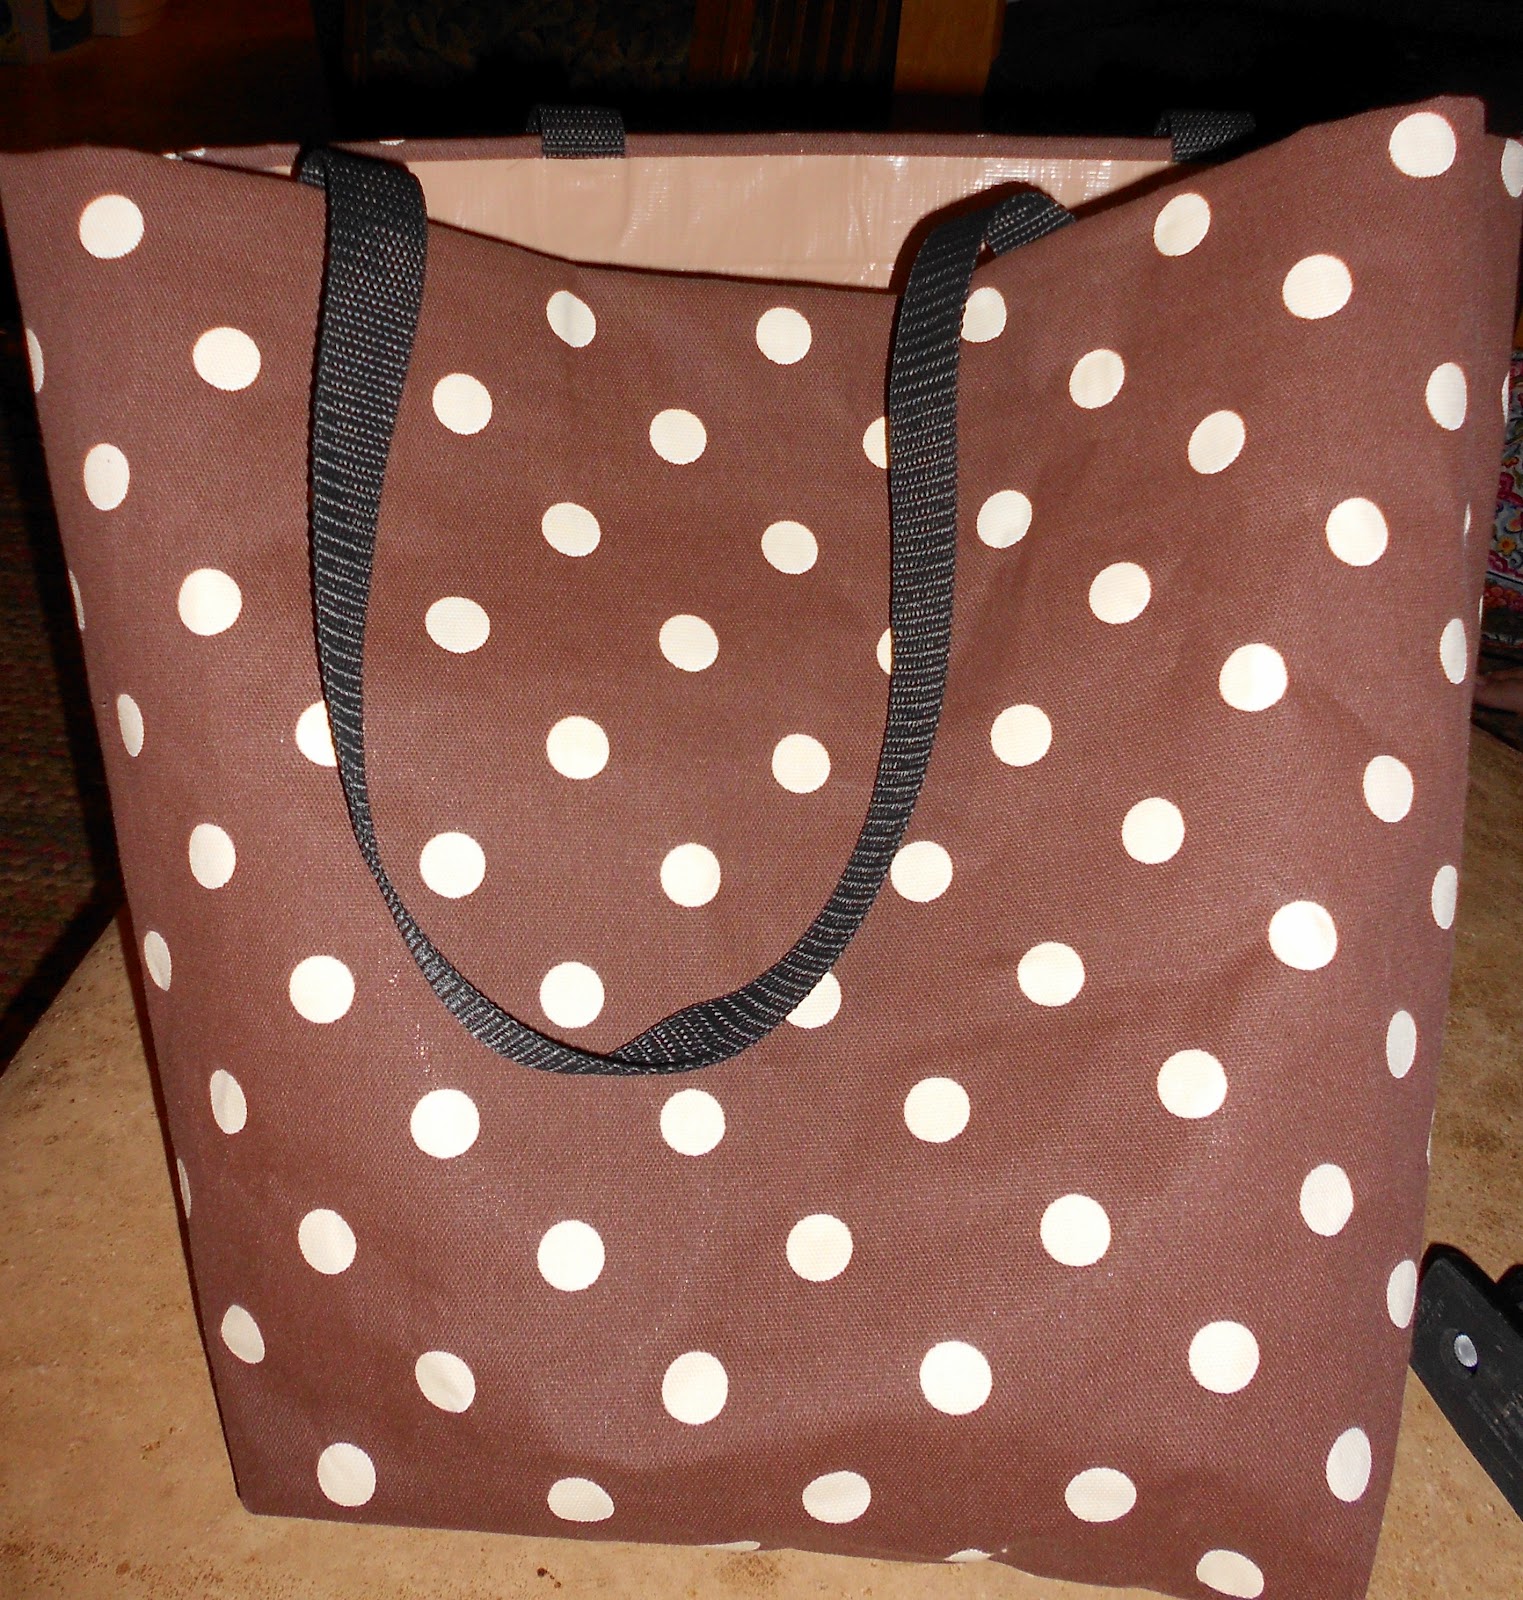
Here is the finished tote... I have to admit, a month into the school year watching her use this to lug heavy books around, I am a believer in the staple/duct tape combo! Plus the inside is fairly waterproof so when she took it to the beach she brought back their wet towels, swim suits and a bunch of sea shells in it, then she just wiped it out and used it the next day for school!
Thanks for listening,

I am not a craft person at all, and I so LOVE this! I'm going to try it; maybe even make some as Christmas gifts. (We live in Florida, so having a tote bag for the beach is a must!)
ReplyDeleteHi Rebecca, thanks for a great idea... and the pictures too. I can never get enough totes. I'm definitely going to try this.
ReplyDeleteI will never, ever make that. You lost me when it went over three steps but I am SUPER impressed with you and your girlie.
ReplyDeleteThat is super cool!! I think even I could make that. ;)
ReplyDeleteI think that's brilliant! Especially that you can just wipe it clean.
ReplyDeleteOops - can't believe I ranted about reusable bags the same day you posted this tutorial... that was NOT directed at you :D Only at the zealots who want to make us all turn green...
Have a great weekend,
Julie